
- Log in to your teacher account. The main Dashboard page will be displayed.
- Select the "Classes" link from the left hand-side menu bar. This will display the Class page
- Click the 'Create a new class' tile

- Enter the details of your class, Class Name, Subject and Year Level from the drop-down menus. You must also set a Professional Focus. Choose from the list of High Impact Teaching Strategies. (This can be edited at a later date if you change your mind or focus)
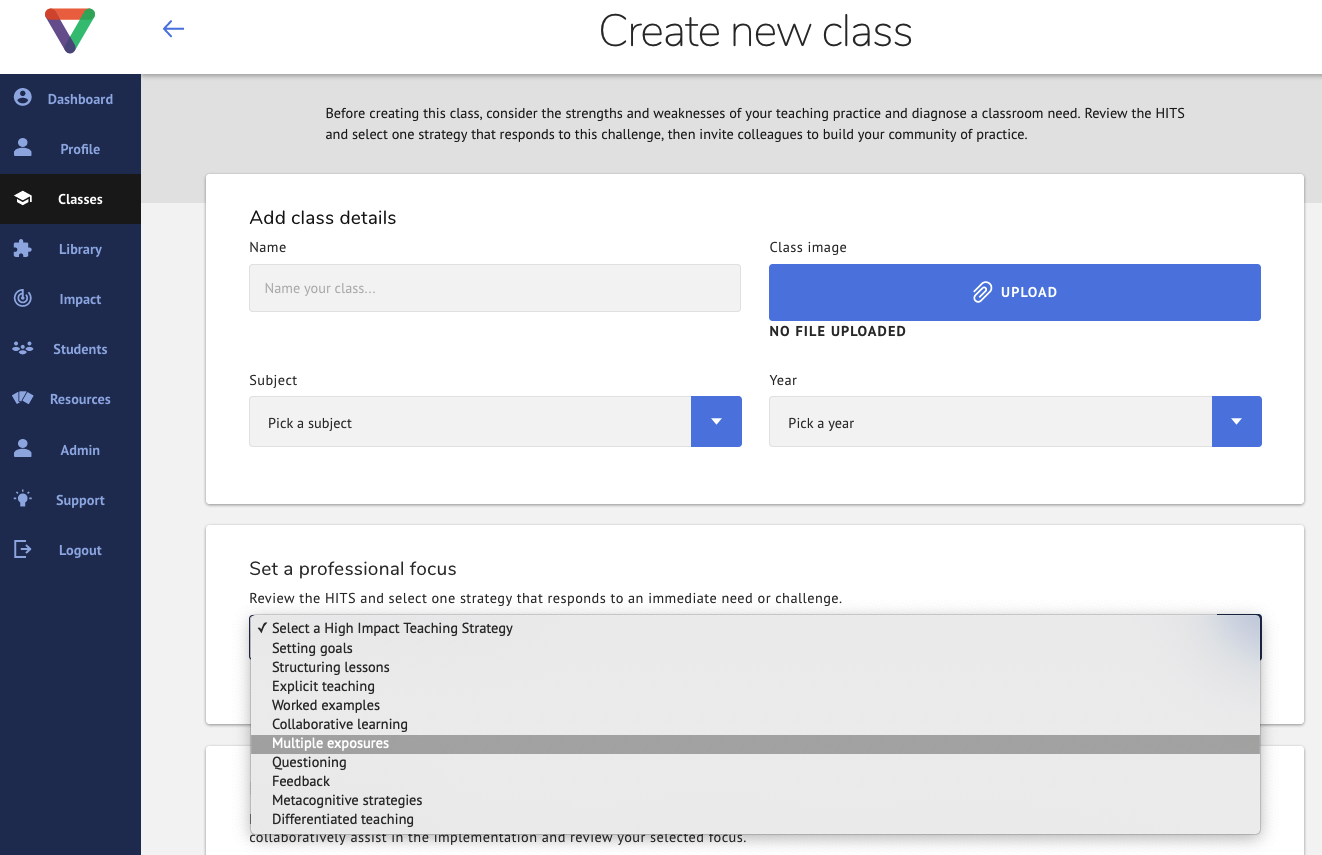
- OPTIONAL: Live/Close Status - You can set the class status to 'Closed' if you are planning for a later date. Closed classes are not visible to students.
- OPTIONAL: You may invite another teacher to collaborate in your class if you wish, this is done via the Add Colleagues.
- OPTIONAL: You may upload a custom Class image for the background of the tile to be displayed for you, and your students. This can be a static image file, or even animated gifs are supported.
- Once you have entered all of the required details, click the "Create Class" button at the bottom of the page. Your new class will be created.
- Once your new class is created, you will be taken into the Class page, where the details you entered are displayed alongside with the unique Class Code that has been generated for your new Class.
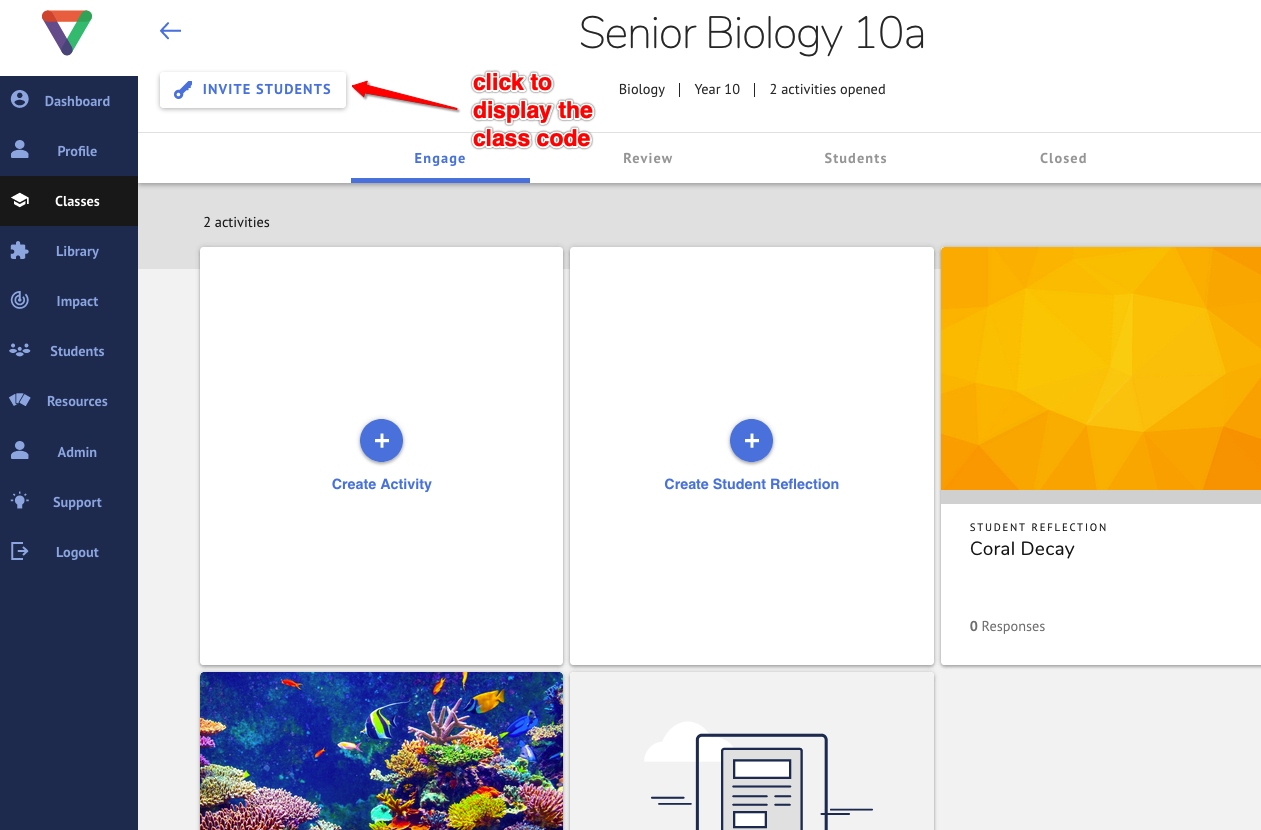
You can now create new activities and student reflections, copy existing activities in from the shared libraries and share your class code with your students to start learning!
If you have any questions, or require further assistance, please click here to create a support ticket.
Comments
0 comments
Article is closed for comments.